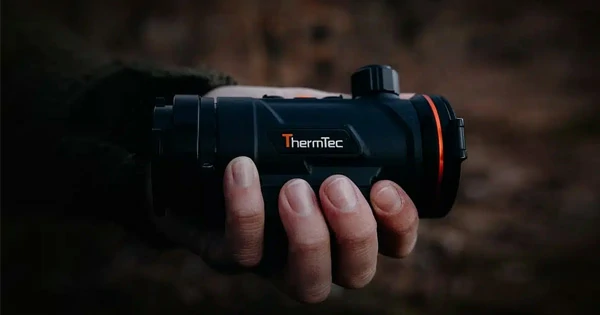
Have you ever found yourself struggling to spot your prey in the dark or dense vegetation? What if we told you that there is a way to deprive these obstacles of their blocking power? Today we dive into the world of thermal vision hunting, where cutting-edge technology meets primal instinct. Without further ado, we enter the world of thermal imaging.
Index
– How Does Thermal Vision Work?
– Thermal Vision vs. Other Types of Night Vision
– Tips on Using the Thermal Vision Device
– Understanding Thermal Signatures
– Being Aware of False Positives
– Using it Together with Other Hunting Tools
– FAQ
How Does Thermal Vision Work?
Thermal vision, often called thermography or infrared imaging, is a technique that uses infrared radiation (thermal energy) to form an image. Any object with a temperature above absolute zero (-273.15°C) emits some degree of infrared radiation. This emission is the result of thermal agitation of particles within an object.
Here is how a typical thermal imaging device works:
– Infrared Sensor: When infrared energy from an object hits the sensor of a thermal imaging device, it is absorbed and converted into heat. This sensor array consists of many pixels. Each of them responds to infrared radiation by heating up. This is one of the first technical data that we are now accustomed to encountering; thus we speak of a 640×512 sensor rather than a 384×288 or other array, where the numbers identify the pixels in the sensor in the horizontal side multiplied by the vertical side. To summarize, a 640×512 sensor consists of 327,680 pixels while for a 384×288 sensor it is 110,562. It goes without saying that the greater the number of receptor pixels, the higher the quality of the image rendered through the device’s display
– Creating an Image: The temperature change of each pixel is then converted into an electrical signal, which is processed into data for each pixel. The data received from all pixels is used to create a detailed temperature model called a thermogram. This process happens quickly, often in about one-thirtieth of a second.
– Image Display: The thermogram is translated into electrical pulses, which are sent to a signal processing unit. This unit processes the data into an image, which can be displayed on the screen of the thermal imaging device.
– Image Interpretation: The final image shows, for example, warmer areas as lighter and cooler areas as darker, providing a visual representation of the object’s heat emissions. Some devices use “false colors,” where different colors represent different temperature ranges, to make it easier to distinguish between objects of different temperatures.
Thermal Vision vs. Other Types of Night Vision
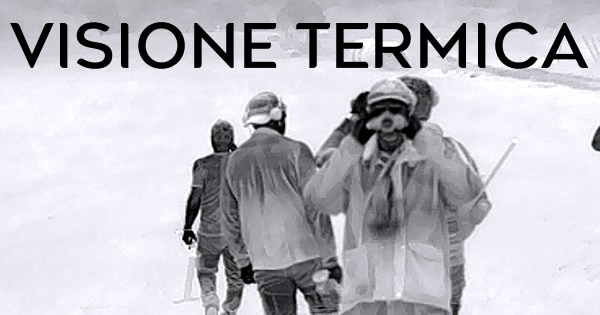
Thermal Vision: As we have discussed, thermal vision works by detecting the heat emitted by all objects, living or inanimate. This heat is detected as infrared radiation and then converted into an image. Unlike the other two methods, thermal vision can operate in complete darkness because it does not rely on ambient light. It is also not affected by bright light sources, so it can be used in daylight. In addition, it can detect objects through obstacles such as smoke, fog or foliage.
Image Intensification: This is the technology most commonly associated with “night vision.” It collects and amplifies available light-including the lower portion of the infrared light spectrum that we cannot see-from the stars, the moon, or our surroundings. The device then amplifies this light to create an image with hues true to real colors. Although this technology can provide detailed images in low-light conditions, it has its limitations. For example, on moonless nights or in dense forests where little light is available, image intensification may not work effectively. In addition, intense light sources may oversaturate and damage the device.
Active Illumination: Active illumination combines image intensification technology with an active source of near-infrared illumination (just beyond what the human eye can see). This can be compared to using a flashlight to illuminate a specific area, except that the light is invisible to the naked eye. Although this method can provide better detail than thermal imaging, it has a limitation: it can alert animals or humans equipped with night vision devices. Two types of infrared illuminators are commercially available: 850nm, which is more powerful but has visible LEDs when observed directly, and 940nm, which is less powerful but completely invisible to most animals.
Tips on Using the Thermal Vision Device
Understanding Thermal Signatures
A thermal signature is essentially the pattern of heat that an object emits. This pattern is unique to each object and is determined by its temperature, shape and texture, among other factors. The concept of thermal signatures is most commonly associated with thermal imaging, where these signatures are used to identify and differentiate between objects.
When viewed through a thermal imaging device, different objects in a scene will emit different amounts of infrared radiation based on their temperatures. For example, a warm-blooded animal in a cold environment will emit more infrared radiation and thus have a different thermal signature than its surroundings.
Here are some key points to consider when understanding heat signatures:
– Temperature Differences: The most critical factor in a thermal signature is the temperature difference between an object and its environment. The greater the temperature difference, the more the object will stand out in a thermal image.
– Emissivity: Different materials emit infrared radiation differently, which affects their thermal signature. For example, shiny or reflective surfaces such as metal might reflect infrared radiation from other objects, while non-reflective surfaces such as skin or fabric will show their heat more accurately.
– Size and Shape: The size and shape of an object can also affect its heat signature. Larger objects or those with more surface area tend to emit more heat, making them easier to detect.
– Environmental Factors: Weather conditions can significantly affect heat signatures. For example, in hot weather, there may not be much difference between the temperature of a warm-blooded animal and its surroundings, making it more difficult to detect.
Understanding thermal signatures is crucial to the effective use of thermal vision in various applications, including hunting, surveillance, search and rescue, and more. By learning how to interpret these signatures, you can identify objects more accurately and make more informed decisions based on your observations.
Optimize Device Settings
Thermal imaging devices have various settings and features that can be adjusted to improve image quality and make it easier to identify objects. Here are some key adjustments you might consider:
– Adjusting Brightness and Contrast: These are fundamental settings that can have a great impact on image quality. Adjusting brightness and contrast can help bring out more detail in the image and make it easier to distinguish between objects with similar temperatures.
– Changing the Color Palette: Most thermal imaging devices offer different color palettes, such as “Warm White,” “Warm Black,” or “Rainbow.” Each palette represents different temperature ranges with different colors. For example, in “Warm White,” warmer objects appear white and cooler objects appear black. The right palette depends on your personal preference and the specific situation. Experiment with different palettes to see which works best for you.
– Use the Zoom and Focus Functions: If your device has a zoom function, use it to get a closer view of objects that are far away. However, keep in mind that using digital zoom can sometimes reduce image quality. Likewise, adjusting the focus can help make the image sharper and bring out more detail.
– Understanding Emissivity Settings: Emissivity refers to the efficiency with which an object emits infrared radiation. Different materials have different emissivity values, and some high-end thermal imaging devices allow you to adjust this setting. If your device has this feature, use it to improve the accuracy of your temperature readings.
– Use Image Enhancement Functions: Some thermal imaging devices have image enhancement functions that can help improve image quality. For example, “Image Sharpening” can help bring out more detail, while “Noise Reduction” can help reduce graininess in the image.
Being Aware of False Positives
In the field of thermal imaging, a false positive refers to a situation where the device detects a heat source and interprets it as a potential target (such as an animal) when it is actually something else. This could be due to various factors such as environmental conditions, device settings, or simply misinterpretation of the thermal image.
Here are some instances that could lead to false positives:
– Environmental Heat Sources: Certain elements in the environment can retain heat and emit it slowly over time. For example, rocks, especially dark ones, can absorb heat during the day and radiate it at night, creating a heat signature that your thermal device could detect.
– Recently Used Fireplaces or Bonfires: Even after they have been extinguished, fireplaces or bonfires can continue to emit heat for hours, creating a strong heat signature on your thermal device.
– Other Animals or Human Beings: If you are hunting a specific animal, other warm-blooded creatures may also appear on your thermal device and may be mistaken for your target.
– Reflective Surfaces: Some materials, such as metal or glass, can reflect infrared radiation from other objects, creating a thermal signature that could look like a potential target.
So how can you avoid false positives? Here are three steps to do so:
1. Cross-check: Use other hunting tools, such as binoculars or a spotting scope, to confirm your target before shooting.
2. Understanding Your Environment: Awareness of your surroundings can help you distinguish between real targets and false positives. For example, if you know there is a recently extinguished bonfire nearby, you will be less likely to mistake it for an animal.
3. Familiarity with the Device: The more familiar you are with your thermal imaging device and how it interprets different heat sources, the better you will be able to distinguish false positives.
Remember, false positives are a common challenge in thermal imaging. Although they cannot be completely eliminated, understanding them and being aware of them can significantly improve your efficiency and success in hunting.
Using it in conjunction with Traditional Hunting Tools
Although thermal vision is a game changer, it doesn’t mean you should abandon your traditional hunting tools. Use your thermal sight to locate and track your prey, but don’t forget to use your binoculars for detailed observation and your rifle scope for the perfect shot. Remember, thermal vision is a powerful addition to your hunting arsenal, not a substitute.
Conclusion
Thermal imaging has revolutionized hunting and enabled hunters to continue their activities at night. But if you want to get the most out of your night vision device, you may need to learn a thing or two. With a better understanding of thermal signatures and how to interpret them, you can eliminate the likelihood of misunderstanding thermal imaging data. Also, with modern devices having various settings and features that can be adjusted to improve image quality, you can optimize your device for different conditions. Finally, it is important to be aware of false positives and use other tools to confirm your target before shooting. All of these steps can help you become a more effective hunter and make the most of your thermal device.
FAQ
Why do different objects appear as different colors on a thermal imaging device?
Thermal vision, also known as thermal imaging, works by detecting infrared radiation (heat) emitted by objects. In hunting, it is used to detect and track animals based on their thermal signatures, even in complete darkness or dense vegetation.
What are false positives in thermal imaging and how can I avoid them
False positives occur when your device detects a heat source and interprets it as an animal when it is actually something else. You can avoid them by cross-checking with other instruments, understanding your environment, and becoming familiar with your device’s interpretation of different heat sources.
Different colors represent different temperature ranges on a thermal image. Most thermal imaging devices offer different color palettes, each of which represents temperature ranges in a unique way, making it easier to distinguish between objects of different temperatures.
Can thermal vision devices be used in daylight or only at night?
Thermal vision devices can be used both day and night. They detect heat, not light, so they work just as well in daylight as they do in the dark. However, in hot weather, it may be more difficult to distinguish between an animal and its surroundings because of the overall increase in temperature.